
 Here are instructions for the mounting and the adjustment of Axis windows versions 4.0 and 4.1
Read more >>
This article only applies to version 4.0 and 4.1 of the Axis windows.
For other versions please refer to these articles
V2, V3 : http://lifeintwizy.blogspot.com/2016/04/axis-v2v3-installation-and-setup.html
V4.2 : http://lifeintwizy.blogspot.com/2016/02/axis-v2-windows-installation-and-setup.html
1 Mounting :
1.1 Axis windows mounting video:
Watch this video and read the additional information below. The video shows the mounting of the version 2 and only presents the general principle of mounting. Many details were changed with the changing versions.
Do not remove the protective sheets before the end.
Do not use an electric screwdriver.
1.2 Mounting of the door plate
Version 4.0
The door plate is a little different but its installation is unchanged from the video.
The door plate is a little different but its installation is unchanged from the video.

Version 4.1 and 4.2
The door plate (3) is much shorter and no longer takes support on the door handle. It is attached to the door with a dome head M6x40 screw (4), a spacer (2) and a large washer M6 (1).
Be careful in the direction of the plate.
Tighten firmly.

1.3 Mounting of the windows
Unscrew the original screws (Torx T30).Version 4.0
Hand tighten two grub screws M6 x 45mm. Do not make more than 2 or 3 turns to keep a maximum screw length outside..

Present the window so as to introduce screws into the holes in the rear part of the window.

On each screw, insert a large washer M8 (1) and screw an M6 nut (2) with a 10mm wrench.
Moderately tighten in order to subsequently perform the height adjustment.
Moderately tighten in order to subsequently perform the height adjustment.


To finalize the installation, on each screw, maintain the nut with a 10mm wrench and tighten the grub screw with a 3mm Allen key so that it no longer exceeds of 1 mm.

Put the nut covers

View of the finished assembly

4.1 version
The rear part of the window is fixed to the door by two drilled rings (1) made of semi-rigid plastic by using the original screws (2).
Screw the rings against the door, taking care to their direction.

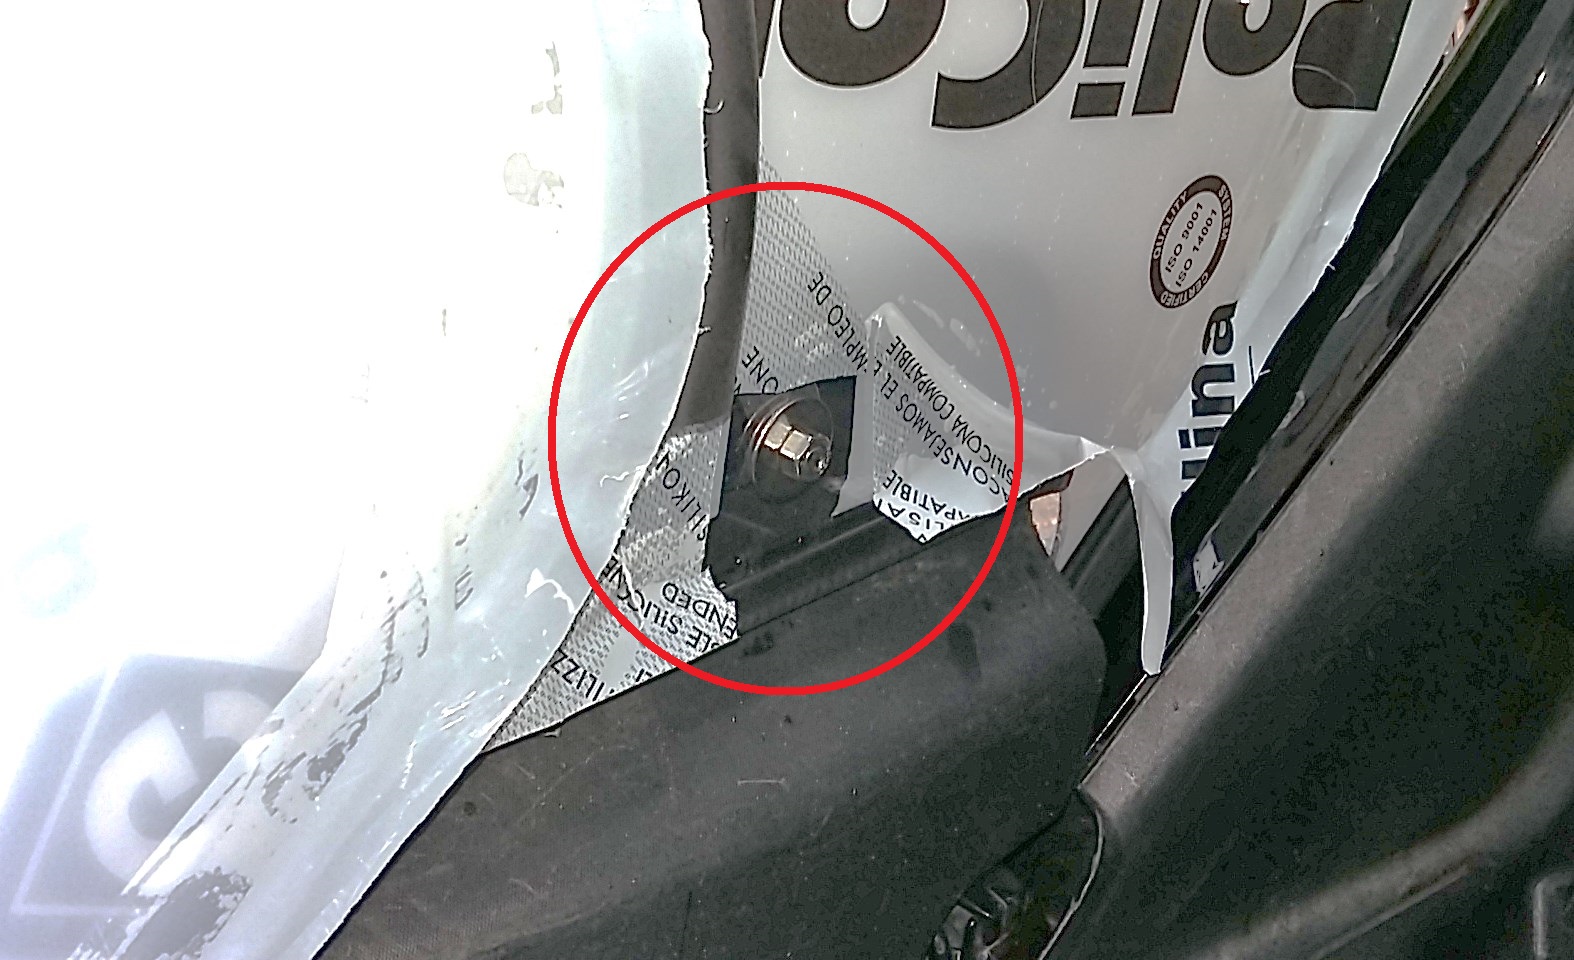
Insert into the small hole of the ring an M6x12 hex and toothed base screw (3).

Present the completely folded window and pass the screw (3) into the corresponding hole (4) .

Place a large M6 washer and hand tighten a single nut M6 (not to lock nut)

Deploy the window and block the outside handle (2) of the front part (1) against the door plate (3) to get a free access to the 2nd rear mounting ring .

Screw the rear part of the window on the second fixing ring, again with a single M6 washer and M6 nut.
Tighten the nuts with the key strongly enough and place the nut covers.


1.4 Fitting the upper handle stop
A stop prevents the upper handle to slide because of the vibrations.
Move the stop wings and insert it against the roof.


1.5 Mounting the deflector wedge
4.1 versions
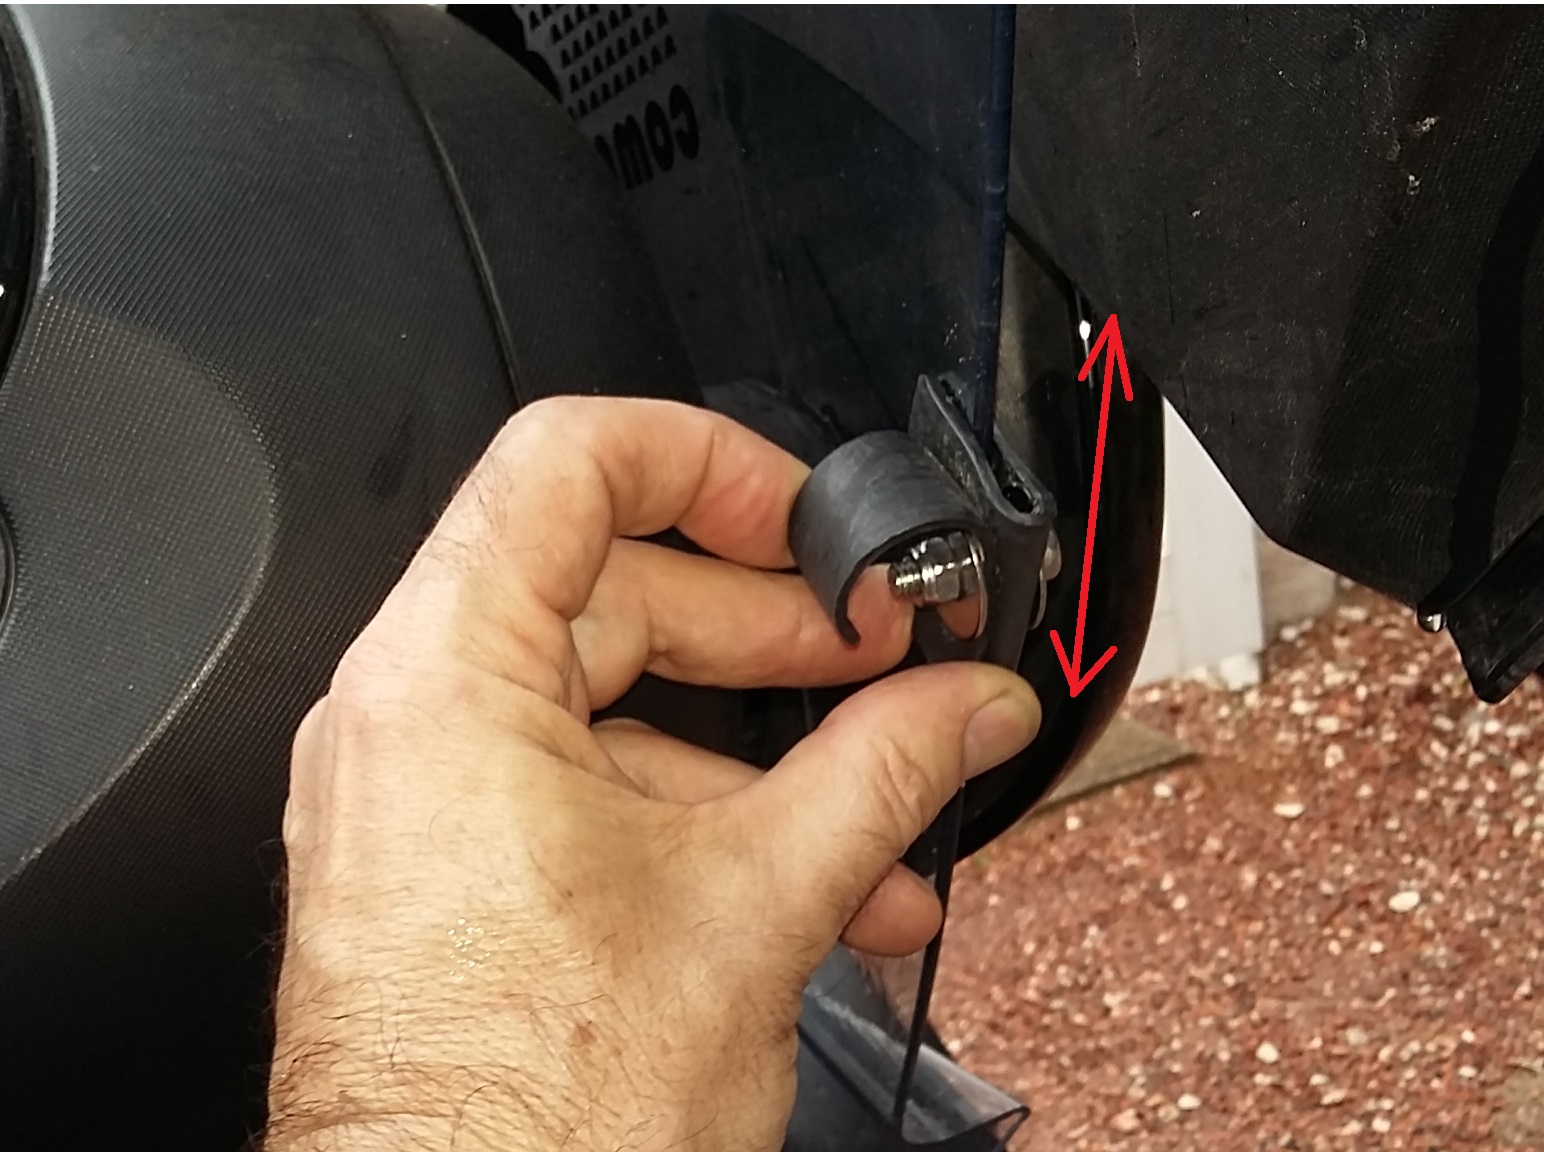
In those versions the deflector gasket-support is replaced by a screwed wedge.
Insert the wedge on the deflector at a height approximately corresponding to the bottom of the front window when closed.
Note the direction of the wedge.
The setting and the final tightening will be done at the end of mounting.

2. Settings:
2.1 Setting the front outside handle:
Check the behavior of the outside handle.In semi-open position, it must be clipped against the door plate so as not to escape if the door is opened.

The video below shows a good adjustment.
When the window is fully open and the door is opened, the outside handle must also come automatically become jammed against the door plate so as not to escape.

The video below shows a good adjustment.
If necessary adjust the rotation of the outside handle for proper operation. As it is firmly screwed to the assembly, it may be necessary to loosen a bit and then retighten after adjustment.
2.2 Adjusting the gasket support or the wedge :
Version 4.0

The gasket or the wedge placed on the front defelector should be adjusted in height so that the front windows does not leave space at the top but also that closing the front window is not obstructed. The video below shows a good adjustment.
Version 4.1 and 4.2
When a satisfactory adjustment is obtained, tighten the wedge very firmly.

2.3 Adjustment of the upper handle stop
Slide the stop so that it prevents the upper handle from sliding too easily.
The video below shows a good adjustment.
2.4 End settings
When the settings are done, remove the protective sheets.
3 Cleaning and maintenance
Axis windows are made of polycarbonate. This material scratches easily (less if treated anti-scratch).
Clean with soapy water and a very soft cloth.
Regularly check the settings.
No comments :
Post a Comment